Tuesday, July 31, 2012

Foodie pen pals - July

foodiepal stamp2 Foodie Penpals
When I was twelve years old, I had a binder full of letters from penpals across the world, from New Zealand, to New Mexico, to Lithuania. So when I heard about Foodie Penpals, I thought 'That sounds like my kind of thing!'. It's open to blog readers and bloggers, and since it started last year in September, has grown to include over 1000 participants! This was my first month participating, and I had so much fun compiling a box of foodie treats for my pen pal Alana, I couldn't wait to receive my box from Kat. Lucky for me, we're both California girls, so my package arrived on the 17th (they have to be mailed by the 15th)! It was a heavy little box, which made me curious about what was inside. Here's what I found:
 
On the top of the package, there was a note card, where Kat explained that the box was compiled with a 'summer picnic' theme in mind - which couldn't be more perfect! I love summer picnics, had planned on taking one to Shakespeare by the Sea (a favorite LA summertime event) the weekend before I received this very box, but had my plans derailed by my scary tire skid on a slick road - that's where the stale baguette came from! But I digress... Anyway, I love, love, LOVE summer picnics, and my box was the perfect thing for me! It included homemade dill pickles, pickled carrots and green beans, and figs in orange syrup, salami, a package of dried mango (which I've been eyeing at Trader Joe's for a while now, and hadn't gotten around to trying yet!), a bag of tea (to go with Kat's very own sweet tea recipe - she's from the South, y'all!), and two cloth napkins... It is PERFECT for me! All I need is a baguette, and I'm all set for a summer picnic with the treats that Kat sent me. Can't wait to see what next month's foodie penpals box will bring. It's like Secret Santa in July!! :)

Wednesday, July 25, 2012

Lovely lavender

You might remember when I went a little nuts and bought four bunches of dried lavender at Trader Joe's... I can't help it, I LOVE lavender, and it's gotten to that point in the summer where all my plants are requiring more frequent watering, and cut flowers hardly last more than a few days before wilting because it is TOO DARN HOT! So buying a bunch of dried lavender seemed the perfect solution for my little table centerpiece container that's been holding a languishing little lavender for a few months now. I kind of squished it into the little container, and that may or may not have caused the languishing... But dried lavender is already dead - so PERFECT solution! :) Well, the lavender didn't quite stand up the way I wanted them to, probably coz the vase has a wide opening, so I needed to get some floral foam to stabilize them a bit. I finally got around to it this weekend, and it took all of 15 minutes (aside from the lovely aisle browsing at Michael's!), so here's how I did it:

You will need:

Dried flowers (or silk if that's what you like)
Floral foam
A knife

To start, use a knife to cut the floral foam to size - you want it to fit snugly into the vase or container you will be using.
Next, lay out the dried flowers on your counter/table/workspace. Begin to add the flowers, a few stems at a time, cutting them to the height you'd like the arrangement to be, as you go. If some stems break, put them aside and save them in case you can use them at the end.

As you begin to fill the container, turn it every now and then, to make sure that the arrangement is full and balanced from all sides (especially important for me as I planned to use this as a table centerpiece. When you are almost done, shake the container a little, and fix any stems that fall or lean over. I was very happy with how my new table centerpiece turned out - it is fragrant, simple and doesn't wilt in the heat! And I ended up with an extra bunch of lavender left over, to give to a friend :)  

Sunday, July 22, 2012

National Hot Dog Day ~ Sonoran style

Bacon Wrapped Hot Dog
Well, I'm not the biggest fan of hot dogs, but while living in Tucson, I had the opportunity to try a local delicacy - Sonoran Hot Dogs (or as some people call them in LA, Danger Dogs). I am sure they're bad for you in every single way possible, but they are delicious, and in honor of National Hot Dog Day (apparently - according to a google search fueled by a facebook post), we had a bunch of friends over yesterday and celebrated with Sonoran Hot Dogs. If you've never tried them, you should! Just not too often :P 

You will need:
Bacon
Hot Dogs
Buns
Tomatoes (diced - I used 3)
Onions (diced - I used 2 smaller ones)
Mayo, mustard, ketchup, relish, chipotle mayo etc. (whatever else you want!)

Heat oven to 325 degrees. Wrap half a piece of bacon around each hot dog (don't overlap it too much as you want it to crisp and cook evenly) and set aside. In a little olive oil, saute the onions until the are softened, then add tomatoes and stir. Cook on medium high heat for about 10 minutes, adding a little garlic salt for extra flavor, if you'd like. While the tomatoes and onions are cooking, cook bacon wrapped hot dogs over medium high heat, turning as the bacon cooks. Place buns on a tray and heat in the oven for about 5 minutes. When the bacon is done on all sides, remove the hot dogs. To eat, pile hot dog buns high with condiments, sauteed onion and tomatoes and enjoy! If you're lucky, your homemade Sonoran hot dogs will come out looking something like the real deal! Yum!!


Thursday, July 19, 2012

Beachy waves!


Well, I have tried to take pics to prove it, but am unable to successfully capture just how pretty the beachy waves are that I created by using this recipe I found on Pinterest - how do people take such great pics of themselves?! Well, for now, you'll just have to take my word for it! When I first read this recipe, I was a bit skeptical, having tried many 'surf spray' or texturizer products. And I know depending on your hair's natural texture/body/wave, thickness etc. it may not work for you. But boy am I happy with the little spray I whipped up this morning! Try it - you might love it!

1 cup warm water
1 tbsp coconut oil (I bought it at Trader Joe's - recommend it for use as a body lotion too for dry summer skin!)
2 tbsp sea salt
a squirt of gel (I skipped this coz I hate crunchy hair, but it was in the original recipe as it helps hold the style/waves all day)

Combine all ingredients in a spray bottle and shake well to combine. Spray on damp, detangled hair, and scrunch if you'd like to. Air dry.

That's it. Five minutes of effort, and I can honestly say I am more impressed with this than any other product I've used! I haven't tried it yet on dry hair (to spruce up waves on the next day), but I will, and I am hopeful it will work just as well. My hair is pretty wavy naturally and prone to frizz, but I am LOVING these zero effort beach waves created by this spray. So try it :) Makes me feel like I'm spending the day with these ladies, on the beach... And heaven knows it's hot enough in LA today to make me wish I was there!

Wednesday, July 18, 2012

Summer nights!

Starry sky, country music and a chiminea fire! Last night was one of those perfect summer nights that make you feel like a little kid again. And laying down on the little outdoor rug with a pillow, next to the fire, all I could see was the stars... and I could have been anywhere else in the world.
Or just ten years old, laying on the trampoline in my backyard. :D

Tuesday, July 17, 2012

Rooftop garden ~ Panzanella!


My rooftop garden is yet to produce a zucchini, but the tomatoes are doing very well! I've already had several, and I found three more juicy ones ready to eat when I watered on Monday morning. And there was a sad, neglected, stale baguette that didn't get eaten this weekend. So I made this yummy salad for dinner last night, and it was delicious!

Bread, cut into 1 inch cubes (stale or fresh, I used about half a baguette)
3 tomatoes, cut into large dice
Roasted red peppers (to taste)
Kalamata olives (to taste)
1/4 cup red wine vinegar
1/4 cup olive oil
one clove of garlic, minced
Sea salt and pepper to taste
Optional: fresh basil, chopped, and/or sliced cucumber

Heat oven to 350 degrees. Brush the bread cubes with olive oil, then toast in the oven for 5-10 minutes, until golden. Combine olive oil, vinegar and garlic in a bowl, and whisk (or put it all in a container with a lid and shake :P). Allow bread cubes to cool a little, then put them into a bowl and pour the dressing over them. Add diced tomatoes, roasted red pepper slices, olives, and other optional ingredients if using, and toss. Let the salad sit and marinate in the dressing for 30 minutes, tossing several times to distribute the dressing evenly. Add sea salt and black pepper to taste. Yum!
We had this for dinner with an assortment of tapas and it was the perfect recipe to use my homegrown tomatoes in - tastes like summer!

Monday, July 16, 2012

Weekend whirlwind


Well, it was another one of those weekends where you wake up on Monday morning and wonder where on earth those days went :) But it was well spent, I think!!! Here's some of what we got up to:

- new tires (skidding on slick roads has a way of making you PRIORITIZE things you have been procrastinating over!) - free oil change with two new tires at Pep Boys at the moment :) 
- super late nights
- finished the four canvas painting I've been working on (I think...)
- concert in the park
- babysitting the most well-behaved kids I know - playing in tents at REI
- laughing a lot because those kids are HILARIOUS!
- hanging out with friends
- finally hung up some art around our house!
- impromptu birthday gathering
- first attempt at chiminea fire!
- S'mores!!!

So it was fun. And I went to bed super late on Sunday night, but happy. And grateful. For friends and family, and for a house big enough to comfortably fit everyone after many, many years in our tiny apartment.

Friday, July 13, 2012

My car smells like Provence...

And I love it. Some things just put the biggest smile on my face, and a whiff of lavender is one of those things. I always keep an eye out for the bundles of dried lavender that make a mid-summer appearance at Trader Joe's each year, and when I stopped by on Monday, they didn't have any yet. But today - oh, today I left with a smile on my face and car that smells like Provence. Can't wait to go home and make a simple, beautiful table centerpiece that will last longer than my bi-weekly flower bouquets have been lately in the summer heat. The fact that is was sprinkling rain, glorious rain, when I woke up today, coupled with the bundles in my front seat makes this the best Friday the 13th I can remember. :D

Wednesday, July 11, 2012

Veggie-licious!


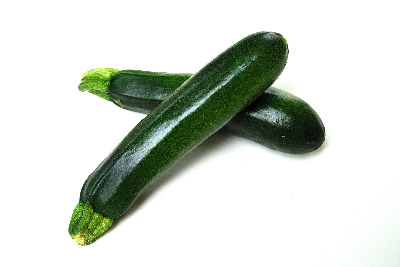
Zucchini Vegetables
Every now and then, I have one of those days where I realize that my alfalfa growning, quasi-vegetarian childhood has made a lasting impression on me. Yesterday was one of those days. I had a fridge full of veggies (my compulsion to buy beautiful looking veggies, even when I'm not sure of when or how I'll use them is probably another side effect) that were going to go to waste if I didn't use them quickly, so my veggie-loathing hubby and I had a yummy vegetarian dinner that he enthusiastically raved about the next day("She made these zucchini things taste like steak" - hahahahaha).
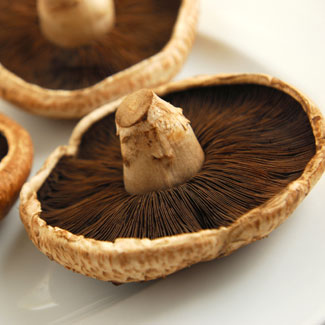
There were grilled portabello mushrooms, season with cumin, pepper and garlic salt, with leftover chimichurri sauce (which is SO good on anything!), a yummy salad of chopped cherry tomatoes, avocado, feta cheese crumbles and kalamata olives, and of course, the very popular zucchini cakes. It's a bit of a joke to call it a recipe, but here's how I made the zucchini cakes.
Preheat the oven to 425. Grate zucchinis (I used three medium sized ones) into a bowl, add a little salt and let it stand for a while (salt draws out some of the water, which can make these tasty little bites soggy, so the longer you can let it stand, the better). Drain excess liquid from grated zucchini, then add one egg and mix well with a fork. Add seasoning (I added salt, garlic salt, onion salt and pepper to taste), and mix well, then form flat heaps of the mixture on a greased cookie sheet. Bake until crispy, about 20 minutes. You may need to flip them over to brown the other side, or if you're impatient like me, you could just brown the other side in a little olive oil in a skillet (the same skillet you grilled the mushrooms in, for example :P). This made five good-sized zucchini cakes, which were eaten before I could snap a pic! Try them - they're veggie-licious!

Sunday, July 8, 2012

My new favorite 'room' in the house!

Well, not everything went the way I'd thought it would this long weekend, but that's okay! I had plenty of time to relax, and be at home, and loved EVERY second of it! But I did get to cross one very big 'to do' off my list. We finally set up our patio!! And I love it! I spent all day Friday reading out there, while trying to dodge a persistent wasp that seems to love my lavender plant! We haven't lit the chiminea yet, but that's coming soon! And for now, I love knowing that we have created the perfect little retreat with the space available to us - my new favorite 'room' in the house!!

Thursday, July 5, 2012

4th of July

Yesterday was pretty much the PERFECT day. Family, friends, fireworks, food... Well, I will let the pics do the talking :)


Yummy desserts
Star spangled patriotism
Fireworks!! 


Wednesday, July 4, 2012

Mini apple pies


Happy Independence Day!! Just found this recipe online yesterday and since everyone else is bringing something blueberry-related, I saved my favorite blueberry crumb bars for another day and made these for 4th of July!

Recipe slightly adapted from Sweet Peony

Pie Crust
3 large apples, peeled & cored (I used 5 medium sized apples)
1/2 cup light brown sugar (I used a little less, as I don't like things overly sweet)
1 teaspoon lemon juice
1 tablespoon corn starch (I skipped this)
1/2 teaspoon ground cinnamon
1/8 teaspoon ground nutmeg
pinch of salt (I skipped this, by accident :P)


1. Cut out rounds of pastry and press into greased cupcake pan (or mini-cupcakes). Two pie crusts made 20 cupcake-sized pies for me.
2. Cut up apples into small pieces (so they have time to cook!).
3. In a large bowl, mix apple with sugar, lemon juice, cornstarch, cinnamon, nutmeg and salt.
4. Slightly overfill mini pies (filling will shrink a little), and then top with lattice, or pastry shapes cut out with a cookie cutter (I used stars - wish I'd had a slightly bigger cookie cutter laying around, but they're packed up with my Christmas things! Next time though...).
5. Brush with an egg wash, and bake in 350 degree oven for 35-45 minutes (depending on your oven - just keep an eye on them).


Yummy!! Mine could have used more filling and a bigger pastry star on top! I think they'd be really cute served warm with melon ball sized scoops of vanilla ice cream, but took the easy way out with whipped cream :)


Tuesday, July 3, 2012

Chimichurri sauce ~ on everything!

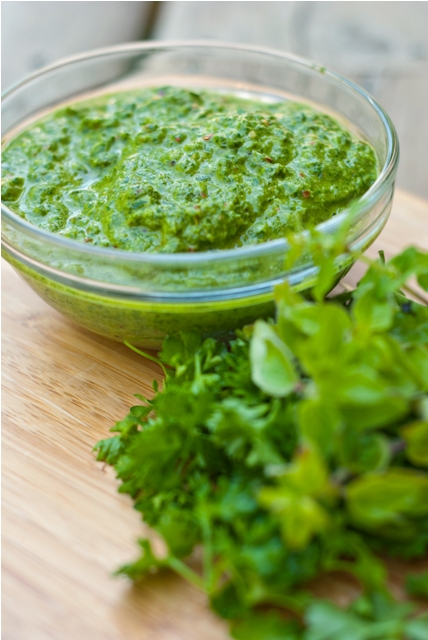
I love chimichurri sauce - I don't know how a simple whirl of a blender or food processor can elevate such simple ingredients to such a delicious, unique flavor, but I LOVE it. It's great on steak (that's how we'll be eating it tomorrow), yummy for dipping a baguette, tasty with pita chips (I discovered when I'd whipped a batch up this afternoon and had no baguette for dipping), and I'm sure it would be delicious on chicken, fish, shrimp, and pretty much anything else you can think of. There are a lot of different recipes for it, and every time I make it, I think I alter it slightly. But here's my yummy chimichurri recipe - try it!

Bunch of parsley
1/2 cup of olive oil
1/2 cup of red wine vinegar
One garlic clove
Salt to taste

Throw everything except the salt in a food processor or blender, and pulse until it reaches a pesto-like consistency. Add salt to taste. Smother everything in it and enjoy :) Keeps for at least a week in the fridge.